A few months ago I finished a historical documentary that I made by myself, The Siege of Fort William Henry. The documentary tells the story of an 18th century siege during the French and Indian War.
The movie recounts the events using historic journals read by voice actors, and features both filmed and animated reenactments. I made the documentary in one year from start to finish.
I wanted to share a little bit about my process for making this documentary, and some of the reasons behind the way I created the movie. Hopefully this can be a resource to anyone interested in documentary filmmaking. If you want to make a documentary by yourself, reading about my process will be helpful. You can see what worked for me, and might find some of it applicable to your own projects.
The Major Steps in Documentary Filmmaking
There are many forms, or styles a documentary (or any movie) can take, but most films contain the steps listed below to make them a reality.
- Choosing a subject, topic, or story
- research – learn as much as possible about the topic
- write the script
- filming – elements, interviews, recreations
- editing/post production
The order of the steps is important, but also functions as a guideline. Some items on the list may happen throughout the entire production.
For my documentary, the last 4 elements on the list lasted throughout the entire process of making the film. I also had a few additional steps, which will be detailed below.
Choosing a Subject, Topic or Story
I started deciding what my next film would be in the Winter of 2020. Initially I planned to make a narrative film. The pandemic thwarted those plans, so I was in search of a new film idea.
I wanted to complete my next film in under a year. So I kept that in mind, as well as the following questions when choosing my subject.
- Is the movie something I am interested in?
- Is the movie something I can actually make?
Due to the coronavirus shutdowns I had moved from New York City to the Adirondack mountains in Northern New York State. I started looking into various subjects that interested me, which took place in the area. Eventually I settled on The Siege of Fort William Henry. A battle that took place in 1757, and inspired “The Last of the Mohicans.”
I am a huge fan of history documentaries, and “The Last of the Mohicans” is one of my favorite movies. The true story of the Siege of Fort William Henry seemed like a great fit. My first question was answered – is it something I am interested in?
Now I needed to think about the second question. Is it something I can make?
What Can I Film by Myself?
The pandemic caused a lot of uncertainty on what kind of filming might be possible, so I tried to devise a plan that I could achieve completely by myself if necessary.
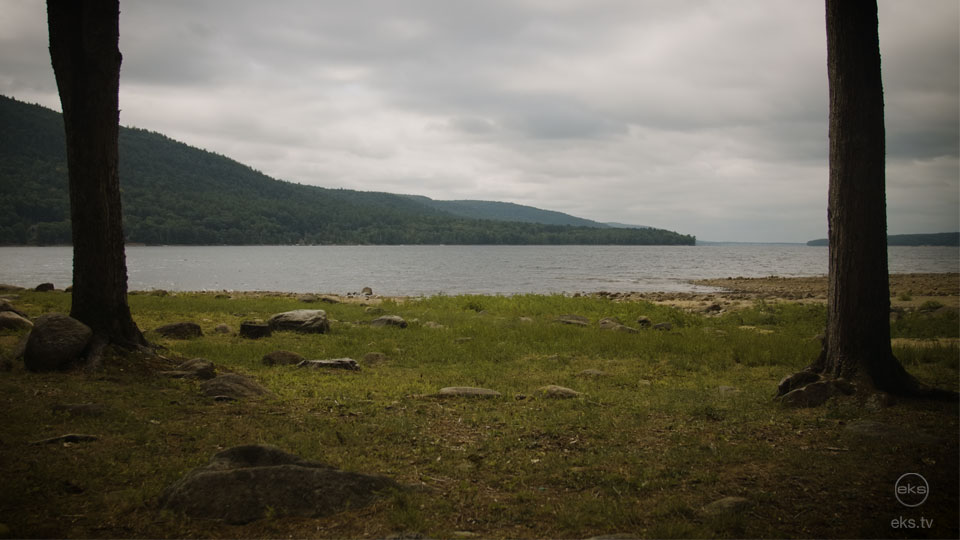
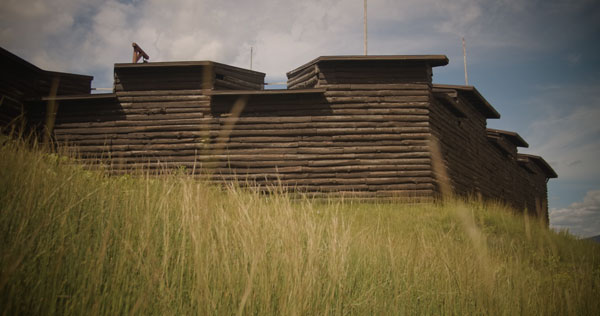
My move to the Adirondacks gave me close proximity to the actual location of the siege – Lake George, New York. I knew I could easily film B-roll of the lake, and the surrounding forests and mountains. There is also a reconstructed version of Fort William Henry at Lake George, which I hoped to get permission to film. All of these things were within an hour drive, so I knew I could get footage to illustrate the setting of the siege fairly easily.
How to display an 18th Century Battle in the documentary?
My next concern was how to visually display the actual events. Since the siege took place in 1757, there are no films or photographs, and very few paintings or drawings of the battle. I needed to figure out how to portray a French army of 9,000 men laying siege to a British force of 2,000 men.
Even without the pandemic it would not be realistic to expect to film a siege by myself with no budget.
Using Animation for historic Reenactments
I have a pretty strong work history in motion graphics and animation, so figured I could lean heavily into this experience. I made computer animations to depict the fort and other events surrounding the siege.
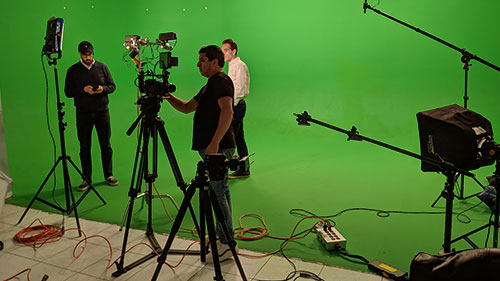
I also knew I could film myself. For some reenactments, and also for some green screen shots I did film myself. I used the green screen footage as a silhouette to make stylized images of some of the events in the story.
Relying on Audio to Tell the story
As I was figuring out how to depict the siege of Fort William Henry visually, I decided I would rely heavily on audio. It is much easier to create the sound of a battle, than it is to film one. High quality sound effects with some well planned footage and animations could help tell a compelling story, and properly depict the siege.
Researching the Story for the Documentary
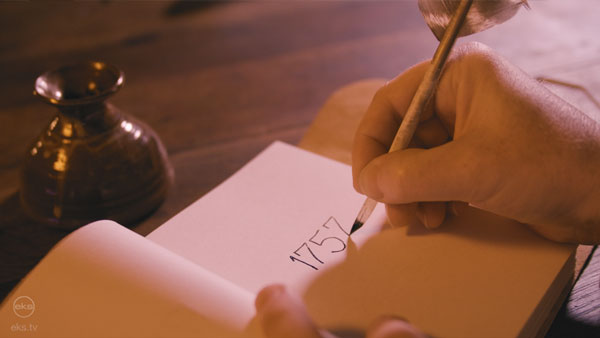
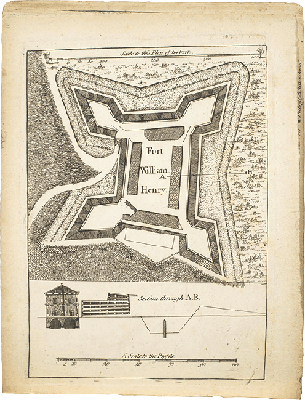
Now that I had an idea how to portray the siege of Fort William Henry, it was time to do the research. I bought several books on the topic to learn as much as I could. I also used the internet to search out copies of historic journals, letters, and maps that were created by men who were at the siege in 1757.
The bibliography sections from the books I bought were a great starting point for my internet research. Fortunately, the Library of Congress, the New York State Library, the National Archives, and other libraries have large portions of their collections available online, completely free.
Ultimately I was able to locate journals and letters from more than a dozen men present at the Siege of Fort William Henry. As well as dozens of maps.
All of the elements I used for my documentary were in the public domain due to their age. The libraries indicate copyright status on most of the items available online, in case you are searching for more modern resources
For my film, research was critical to learn the history I intended to portray. However, research is an important step in any documentary. Not just to learn the story, but to be prepared for filming. Even for a verite/direct cinema style documentary, research is important. Knowing as much as possible about the subject, will inform you where to aim the camera to capture great footage.
Writing the Script for my Documentary
Armed with my research, and historic documents, it was time to write the script. I decided the historic journals would be the basis for telling the story. The words from the men who were at the actual event would be the best way to tell an engaging story. Voice actors would read excerpts from the journals with story gaps filled in by narration, and interviews from experts.
I wrote the first draft of the script pretty quickly. It was a complete word dump. I told the story, but also included way too much of my research and quotes from the historic journals. I reworked my script off and on for several months, but moved into filming and post production right after I had my rough draft.
From this point forward I began filming and assembling the documentary in my edit timeline – rewriting as I progressed. Writing, filming and editing all became intertwined. Each part informing the others.
Filming the Documentary
I started filming elements for the documentary as soon as I decided the topic – even before I had written the first draft of the script. As I researched the story, and considered what would be included, I took advantage of any opportunity to gather footage. A fun afternoon kayaking on a lake became an opportunity for some B-Roll. A day hike up a fire tower in the mountains – an opportunity for establishing shots.
After I had the first draft of the script written, I began seriously planning which shots I needed to portray various aspects of the story. I ordered some 18th century props and costume pieces, and kept an eye out for any environments or elements I already had access to – antique tables, old lanterns, etc.
Making a Proof of Concept Video for the Film
My first real objective of filming was to make a proof of concept teaser video of the documentary. The first page of the script, the cold open, was the basis for this video.
I visited Lake George, and the modern reconstruction of Fort William Henry to gather some shots. I also staged some small interior shots, and filmed myself in some reenactments. In addition to this initial footage, I created a few animations for this first video clip.
The reason behind the proof of concept video
This proof of concept video served several purposes. The first and obvious one was to test out my workflow, and visualize the style of the final product. To be certain my plan could work.
Most importantly this video was used to show other people. Having a short work sample was a great tool that helped me gain access to film at The Fort William Henry Museum, and get historians and experts as interview subjects.
The video also served as a promotional tool, which opened up more filming opportunities. There is a very enthusiastic community of French and Indian War reenactors online. After seeing my first teaser video, some of these folks reached out to me, and offered to be filmed for reenactments.
Filming Reenactments
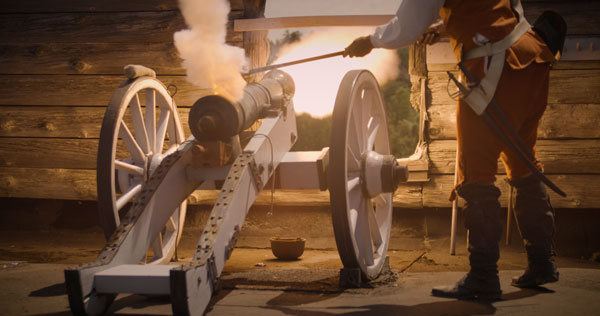
Having permission to film at the reconstructed fort was a huge help in adding to the film. I was able to get footage of cannons firing, an encampment, and many other 18th century period shots.
These shoots either took place during tours of the fort, or at specific events they held during the summer. I was given special access to certain areas, but wasn’t able to stage any shots. I had to film the action as it happened.
The run and gun nature of the filming meant I needed to react to what the reenactors were doing. This is where research, and knowing my story really paid off. I knew what footage I wanted, and would get an overview of what would happen at each event beforehand. This allowed me to place myself in the best location, before certain actions took place.
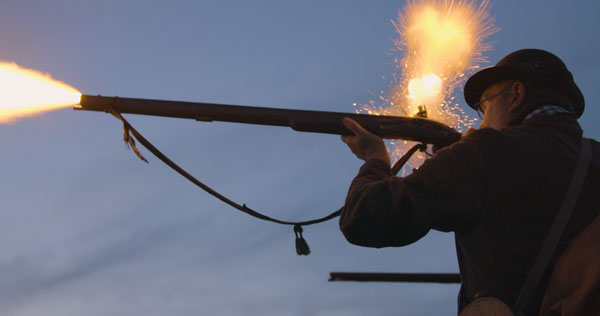
I framed out tourists, and other modern elements the best I could. One large obstacle was that most people were wearing masks due to the pandemic. As a result I framed out most faces, or filmed people from the back quite a bit. Regardless, I was able to get a lot of great footage. The reenactors at the events spent years researching and creating their kits. This gave a level of authenticity and detail to the costumes that would have been almost impossible to create on my own.
Staged Reenactments
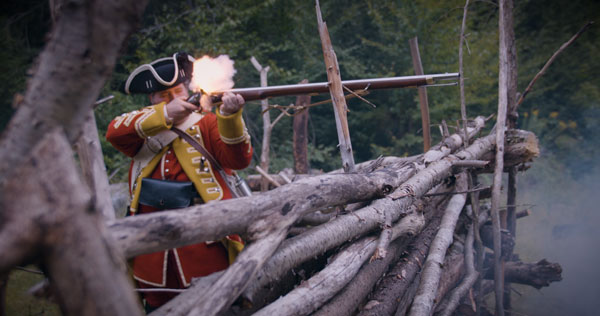
I was also able to film with one reenactor for a few hours, at my location. This reenactor had hand made a period accurate uniform of the regiment that was in the fort at the time of the siege. His attention to detail added greatly to the production value of my documentary. His participation also allowed me to stage specific shots, which was a very welcome addition. I was able to get a lot of great footage with Eric, that really helped visually tell the story of the siege.
We filmed in front of a wooden wall, which doubled for shots inside the fort. We filmed on greenscreen, and on some old logging roads in the woods.
I also built a barricade out of logs which was used in several shots. I used this barricade “set” for several reenactment scenes. Some featured family members I roped into helping me, and a few featured me, with family members operating the camera.
The bulk of filming for the reenactments took place on 6 or 7 separate days spread over 2 or 3 months. Each shoot only lasted about 2 – 3 hours at most.
Additional shots and sequences were picked up throughout the filmmaking process. Some last minute shots were created as late as a few weeks before the documentary was finished.
Filming Interviews for my Documentary
Most of the interviews I was able to secure were filmed about a month after I wrote the first pass of the script.
I was not entirely sure where I would include the interviews in the final documentary, but had a good idea where I wanted to place them. I wanted the interviews to give context to the time period and setting of the events, not to describe the siege itself.
I focused on questions that played to the strength of each interviewee, and steered the questions toward the portions of the story I hoped to cover with the interview footage.
Editing/Post Production of the Documentary
As I mentioned above, I dove into post production as soon as I had my first draft of the script. I used the editing process as part of the writing process.
Assembling a Radio Edit
Since I planned to rely heavily on voice actors reading the historic journals, and sound effects to add excitement to the siege, I looked at my editing timeline as a radio play. I recorded all of the narration, then did terrible impersonations of French and British accents to record the various journal entries. Next I assembled all of the audio in my editing timeline, and added any footage that I had.
I now had a very rough version of the documentary with a lot of missing pieces.
Editing, Filming and Rewriting My Documentary
I watched/listened to my editing timeline and started rewriting the script. I reworked various sections of narration to make them flow better. Entire sections were removed that didn’t contribute to the story, and I made shot lists of the footage I would need to shoot. Any place where there would be an animation, I added text on screen describing what the animation would ultimately look like.
As I shot new footage, I added it into the timeline. I also added preliminary sound design and music to the sections that were the furthest along. About every 2 weeks or so i would record any new narration that had been written while I edited.
I continued working on the documentary this way for several months – filming, editing and rewriting. Eventually I added the interview clips into the timeline, and had voice actors record the excerpts from the historic journals.
Creating the 3D animations
After a few months, I needed to start working on the computer animated reenactments, map animations and green screen composites. I reached a point where I couldn’t continue editing without filling in all the gaps in the video track.
Building the 3D models
The first step was to build all of the assets in the computer. I started with the fort and the landscape. I built the 3D fort based off of plans that were used to build the actual fort in 1755. The environment was based on a map from the time period.
I used real world scale in the 3D software when building the models, so that all of the digital assets would be the correct size when the various project files were combined into scenes later.
In addition to the fort I made several boats/canoes, cannons, tents, buildings, and weapons.
I also made a variety of characters and their clothing – 11 British soldiers, 10 French Soldiers, 6 Native Americans, and 7 colonials. I was able to take advantage of stock 3D models for some assets.
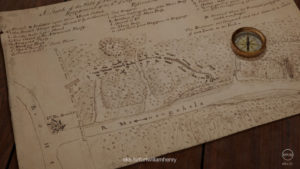
To display maps, I built a CG table scene. I created a table, candle, lantern, compass, and some wooden icons to show troop positions. The map images were digital scans of historic maps that were downloaded from the Library of congress and other sources.
Rendering the 3D Animations
As I built the CG elements I did many test renders (generating the final image). The shots I created for my proof of concept video had taken about 20 hours to output a 10 second 4K video. I couldn’t wait a day each time I created a new animation, so I adjusted the style in order to keep the render times as short as possible. Ultimately I was able to get the render times down to 1 – 4 hours for most shots.
Building and texturing all of the 3D models took about a month and a half.
Editing and Animating
While making the 3D assets I hadn’t looked at my editing timeline at all. This break from editing gave me a fresh perspective on what I had. This is when I really started tightening up the story and the pacing. I started at the beginning of the film and worked my way to the end.
During the day I would edit video and audio – adding sound design, and music. I also did some rewriting where necessary.
In the afternoon I would build the 3D animations for the scene I had been editing that morning. I would create several animations each evening and set them to render overnight. The following morning I would do any necessary compositing on the animations, and then edit them into the documentary.
This process continued more or less for a few months. Some days I would focus on editing, and others mainly on animation. There were also some afternoons where I needed to gather additional footage.
Whenever I had something new – whether it was footage, voice over, or animation – it was immediately placed into the film. I could see right away whether an animation need to be changed, or whether additional elements were needed for any given scene.
At a certain point all of the gaps in the video had been filled, and no more rewrites were taking place.
Color Grading and Sound Mixing
After I felt that my documentary was in a good place, I moved into the final stages of post production.
I went through the whole film (again from start to finish) and worked on the color grade and finishing. I did 2 passes on it – applying noise reduction, digitally removing anachronistic elements from various shots, and adjusting the colors for uniformity, and mood.
Once I was happy with the look of the film, I moved into audio cleanup and sound mixing. I did both the color grade and sound mix in my editing software as much as I could. This allowed me to continue adjusting the edit, swapping out clips, or other cleanup right up to the last minute. This turned out to be a good idea, since I found a few mistakes that had slipped through my initial passes.
The Final Documentary and the process of making it
The Siege of Fort William Henry is something that I am very proud of. I hit my deadline to make it in a year (just barely), and I think it turned out very well. The story has a much larger and more dynamic feel than I had originally thought possible. I don’t think anyone who sees it will think I made the documentary by myself, when they watch it.
Most importantly I really enjoyed making the documentary. Every aspect, from researching the topic to final post production was very enjoyable.
The workflow that I employed – essentially building the entire film up together – really worked well for me. I found that making writing – filming – editing into one integrated process suited me, and my working style.
Hopefully others will find interest in reading about my process for making this documentary. Perhaps some of my working methods will be picked up by others for their own projects.
What’s Next?
I am already planning another documentary, and will employ many of the same methods I used in making The Siege of Fort William Henry. More info about my upcoming documentary will be shared once I have something to show. I will also be sharing more behind the scenes content while making this new documentary.
Sign up below for videos and news on my future projects.

Magnificent work Erik. One of my favorite epochs in Military History!
Thank you John, I appreciate it. It is a fascinating time period. I hope to revisit it in the future with another documentary
Excellent!!
Thank you Reynaldo. I’m glad you found value in it