How to Photograph Stars in the Night Sky
Tips to photograph stars in two different styles. Get advice based on my experience, as well as examples with the camera settings I used.
My brother and I were in the Adirondack mountains, in upstate New York over St. Patrick’s day. He is a fellow photographer and wanted to shoot some night photography, which I was definitely up for. There was a new moon at the time, and we were fairly far away from large sources of light pollution, so the conditions were pretty good.
I have shot a bunch of photos of stars in the past with some decent results. Usually I took the photos while camping or on a backpacking trip and just thought “Well I’m in the middle of nowhere, it must be dark enough.” This has served me fairly well up to this point.
My brother introduced me to an excellent website called www.darksitefinder.com This site has a map feature with color coding to show you the amount of light pollution in any given area. Armed with this information we headed up to Griffin Gorge, about a 30 minute drive north of where we were staying, which had the least light pollution in our immediate area.
What you need to photograph stars
To photograph stars you definitely need a tripod for the long exposures.
Some people also recommend an intervalometer to prevent any camera shake caused by pressing the shutter button. If you don’t have one, just use your cameras timer function. This will give enough time for the camera body to settle before the exposure starts.
I also would highly recommend a good flashlight and headlamp, both with new batteries.
You don’t want to spend all the effort lugging your camera gear out somewhere and then have to stumble out in the dark or worse yet leave some of it behind because you couldn’t find something you dropped.
Star Photography styles
There are two main types of star photos. One captures the stars as pinpoints in the sky and the other captures them as streaks across the sky due to the earth’s rotation. Typically the “pinpoint” photos are a single photo, while the streaks are several photos stacked on top of each other in Photoshop. (This sequence of photos can also be used to create a time-lapse video of the stars movement across the sky)
You will get the best exposure of the stars if there is no moon. If there is a moon and you don’t want it in your photograph you can find out its rise/set times, as well as its arc for your location at www.photoephemeris.com/tpe-for-desktop/
It might be helpful to bring a compass to assist you in figuring out which direction to aim the camera based on the information from that site.
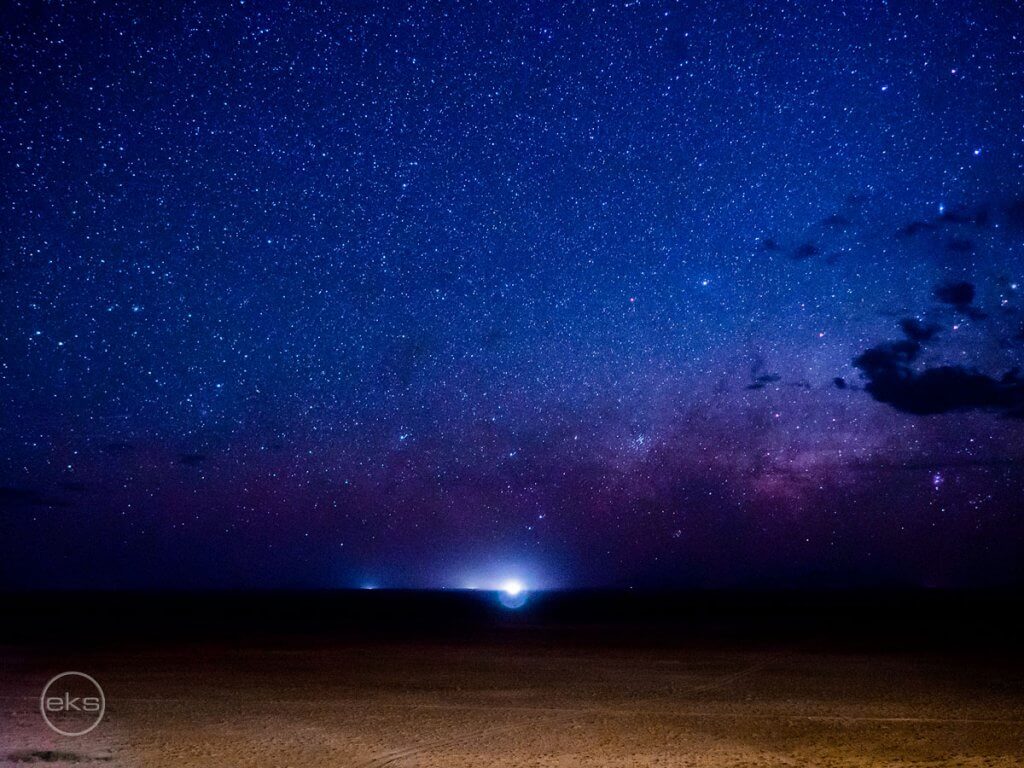
If there is no moon and you are in a very dark location, you might be able to capture the milky way as well as the stars.
Setting up for your night photos
To get the stars to expose properly you will need to use a fairly long exposure time – anywhere from 10-60 seconds depending on the effect you are after, the darkness of your location and your camera/lens.
What I usually do is turn my ISO as high as it will go and adjust the shutter time to get an exposure. Then I shine my flashlight on a distant object to set proper focus and snap a few shots to set up my initial framing.
Once I’m happy with my composition and focus, I’ll set my ISO back down to around 800-3200, (depending on the scene) adjust my exposure time and snap a few test photos to make sure I have all my settings correct.
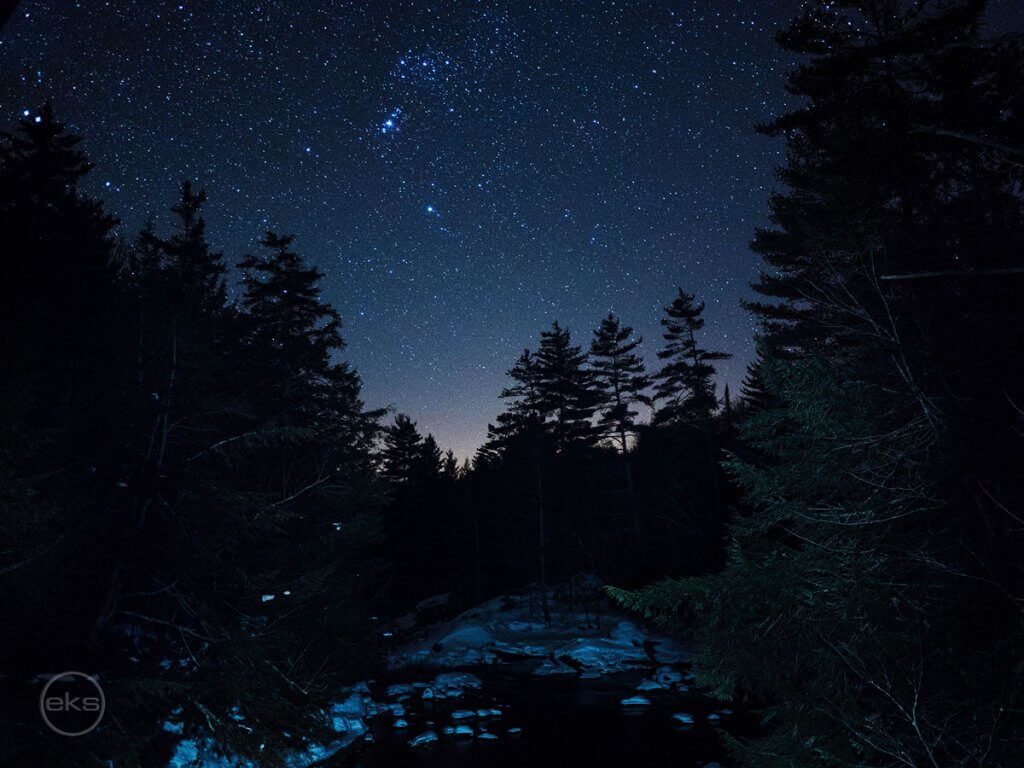
Pinpoint stars photos
To get the pinpoint stars it is easiest to use a fairly wide angle lens with the iris all the way open and the iso set only as high as you need it. Depending on the camera, around a 28mm f2.6 at iso 800-1600 and an exposure of 10-20 seconds should achieve good results in a location with minimal light pollution.
If you use a longer lens you will need to decrease the exposure time to avoid the stars turning into streaks. I have found that a 6-10 second exposure with a 50mm lens at f1.4 can deliver good results.
The 500 rule
There is a technique, referred to as the “500 rule” for determining exposure time. Basically you divide 500 by the focal length of your lens to find out the ideal exposure time.
For example if I was to use a 50mm lens (on a full frame camera) the math would be 500/50=10 second exposure. If you are using a crop sensor camera, you need to account for this by multiplying your focal length by the crop factor, then dividing by that number.
For example the math for a micro 4/3 camera with a crop factor of 2x using a 50mm lens would be 500/100 = 5 second exposure.
I have found that this is not a hard and fast rule, and would keep your exposure times a little shorter until you are comfortable with what works for you and your camera.
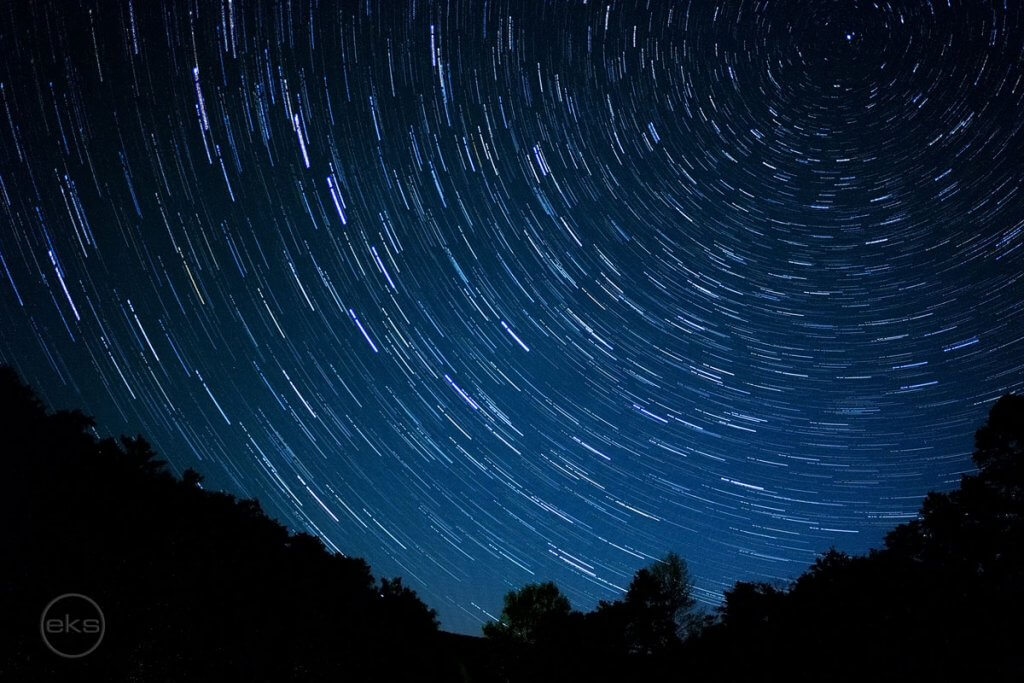
Exposing Stars as streaks across the sky
Exposing the stars as streaks across the sky is much easier; you can pretty much expose for as long as you want to so you can achieve the exposure you’re after.
You could try to do one 20 minute exposure and see how it comes out, but I find it is best to use an intervalometer set up to take a series of 20-30 second exposures. How many photos you take is up to you, but I find that at least 30-40 will give a decent size streak, depending on the composition.
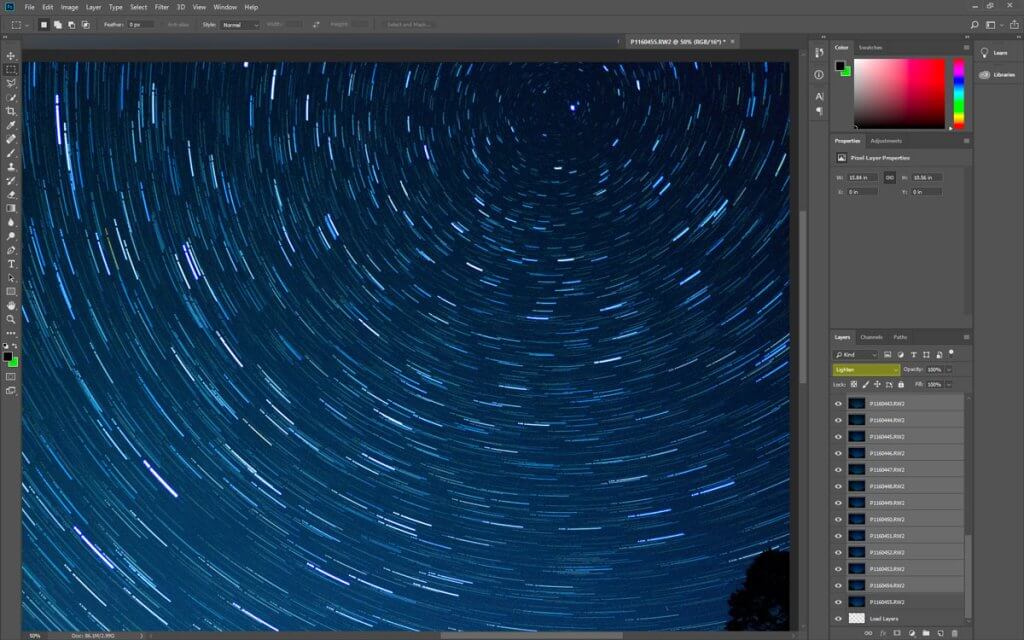
Once you have all of your photos, you just need to bring them all into one photoshop comp and change the blending mode for all but the bottom layer to “lighten.”
If your camera has internal noise reduction you might want to try turning it off. On my cameras a 30 second exposure takes an additional 30 seconds to save with the noise reduction enabled. This prevents me from immediately taking a second photo once the first has finished.
Keep in mind that the earth’s rotation will dictate how your star streaks curve. In the northern hemisphere the stars will pretty much appear to rotate around the North Star. If you aren’t good at spotting stars and constellations, there are plenty of smart phone apps out there that allow you to point the phone at the sky and display the names of the stars you are looking at. (If your app uses the Greek name for stars, you are looking for “Polaris”)
Additional tips
To add some light on the foreground elements in your scene you can try using your flashlight to do some light painting, or set up a flash. The flashlight is the easier option to cover a large area, but also much harder to achieve repeatable results with.
Star photos are a lot of fun to capture and quite satisfying when one turns out well. You will need to experiment to find which settings work best for your equipment and aesthetic sensibilities. Night photos take a bit of time to capture and due to light pollution, weather and other factors, suitable locations aren’t always close by. Hopefully this post has helped give you a starting point for photographing stars, so you won’t come back from a shoot disappointed with your results.